just a csharp guy an AWS guy
« go back
Rapidly setup your very low cost, durable, cloud hosted website on Amazon S3
Things to note:
- - You need to understand web applications to a degree and be comfortable with HTML, TypeScript and usage of AWS
- - You might incur some AWS charges, if you drift away from free-tier limits (if you follow this guide, you will not)
- - If you use your own domain name, the bucket name you choose must match that domain name exactly. Also, Route53 domain names purchased through Amazon will incur a cost
The end goal here is to have a website that you made and deployed to the cloud, which you can make your own, add content to and use to stand out from the crowd.
Step 1
Sign up to AWS and create your root account. In practice, using the root account (which has god privileges) to do anything in AWS is not good practice, but for the purposes of this demo we will use it.
Step 2
Create a basic HTML page as a placeholder. Something along the lines of the below will do just fine
        <html>
<head>
    <title>Your homepage</title>
</head>
<body>
    <h1>My shiny new website</h1>
    <p>Hello world!</p>
</body>
</html>
Step 3
1.) Setup your AWS bucket
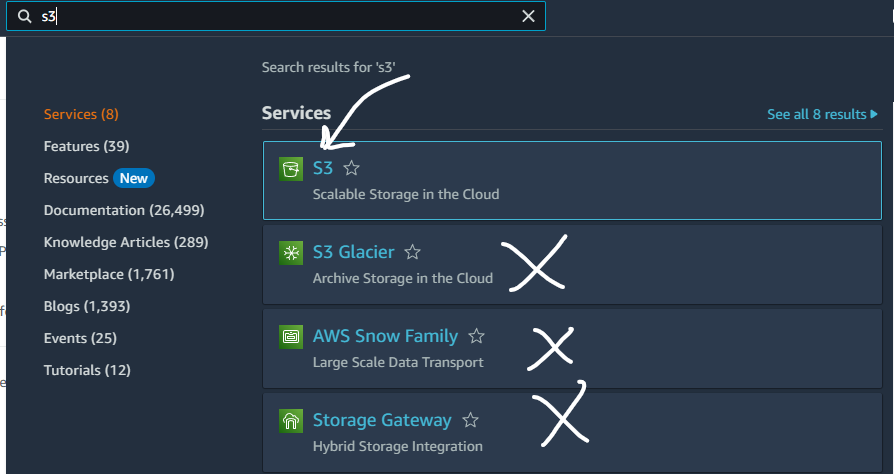
Login to your AWS account if you're not already and then find your way to the S3 section. A simple way to navigate AWS is just to search for stuff, like this:
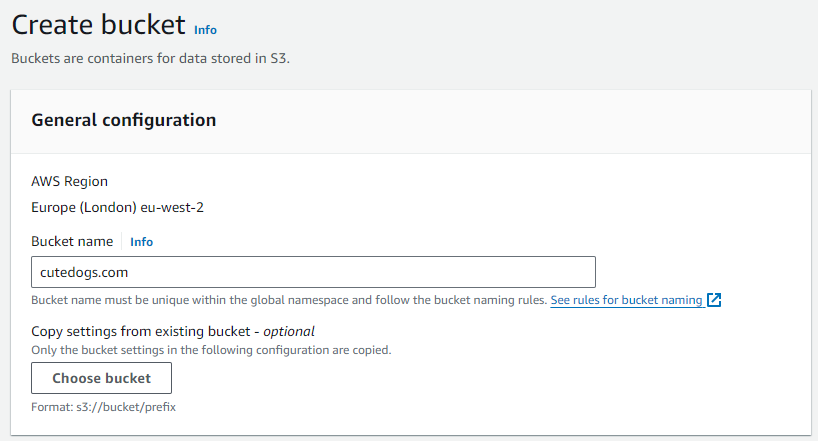
2.) Create a bucket - giving the bucket a suitable name. It's important to note that if you plan on using a custom domain name, you MUST create the bucket with a name that matches the domain (i.e. if you plan to use cutedogs.com, the bucket needs to be called cutedogs.com also)
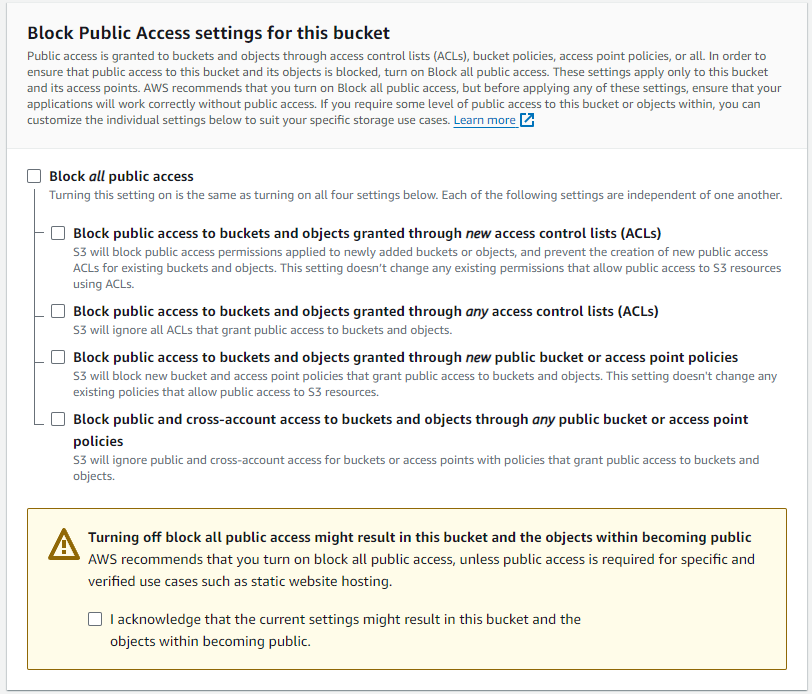
You should also untick everything in the 'Block all public access' section, because you don't want to block public access. Take note not to upload anything to this bucket that isn't public information, too. AWS will force you to tick a box that states that you understand what you're doing. You do, of course, so tick it.
The remainder of the options on this screen can all be left default, there's nothing that doesn't have a sensible default on the bucket creation process, so that's all fine
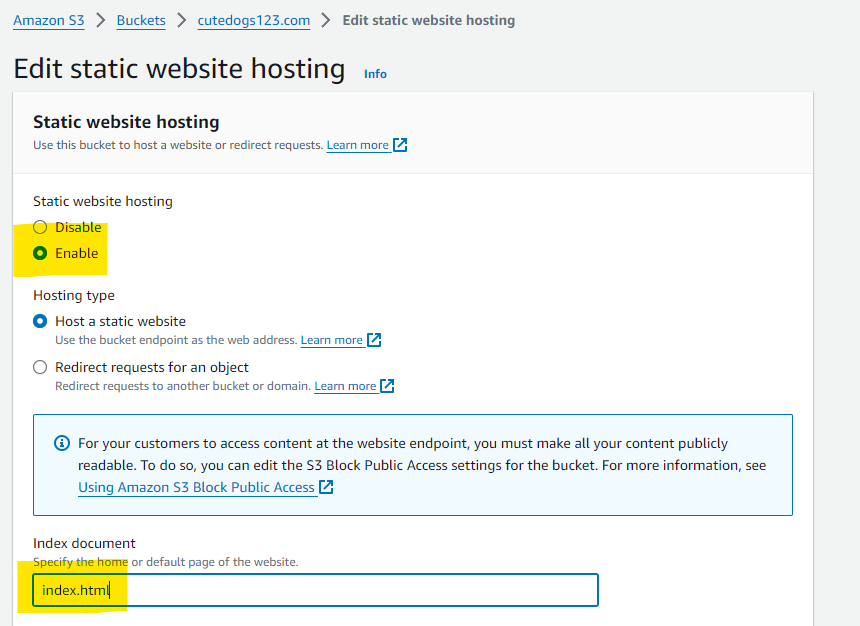
3.) Turn on Static Website Hosting - click on your bucket and enable the Static website hosting option at the foot of that page
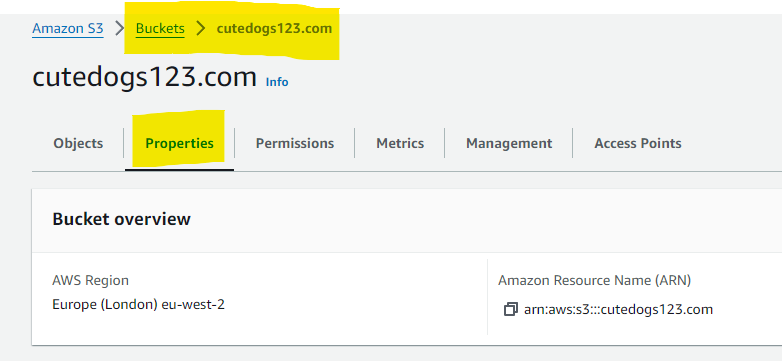

Note that you have to specify the name of a html page to act as your index document, so type in index.html (this will be the dummy html we setup earlier which we'll upload shortly)
Step 4
Head back to your Properties tab and scroll to the foot of the page. You will see now that you have a link to your static site, so let's click on that...

Oof, an error. Specifically, a 403 - not a 404 as you might expect, since we haven't added our index document that we specified. What's this about then?
Well, this is a specific security implication of S3 buckets, which I wanted to illustrate directly. Essentially, making a bucket public does not mean 'everything inside the bucket is public' - you need to control that using a separate process, by way of a JSON document that represents a bucket policy. So let's sort that out next
Step 5
Add a bucket policy
Head to the Permissions tab of your bucket and scroll to the Bucket policy section and click Edit, then paste in the following, replacing BUCKET_NAME_HERE with your bucket name, and click Save
            {
    "Version": "2012-10-17",
    "Statement": [
        {
            "Sid": "PublicReadGetObject",
            "Effect": "Allow",
            "Principal": "*",
            "Action": "s3:GetObject",
            "Resource": "arn:aws:s3:::BUCKET_NAME_HERE/*"
        }
    ]
}
If you understand json, you'll probably grok this ok, but if not - this is basically just saying that any attempt to 'get' an object (*any* object, within your bucket), such as your html page(s), your javascript or your CSS (to name a few examples) is 'allowed' - the asterisk after the forward slash is important here, as it specifies that anything can be read.
Save this policy and retry your bucket link, from the Properties tab, which will give you a different error now
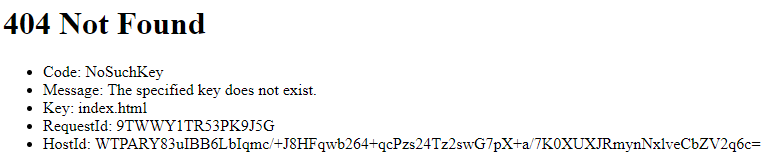
Now, this is more in keeping with what you would have expected. We haven't uploaded our index page yet (index.html) - so we get a 404, as the static website hosting settings are attempting to render that document. When you request something in S3, that you're allowed to access via a bucket policy, but it does not exist, you will get this 'NoSuchKey' error message. This is important to remember, as it's not the most human readable message when you've either forgotten to upload something, or have mistyped the name of something.
Step 6
Upload your files and see version 0.0.1 of your new website!
Go back to your buckets page and click on your bucket, then click either of the two Upload buttons on this screen. Alternatively, just drag your index.html file from your operating system directly onto the page.
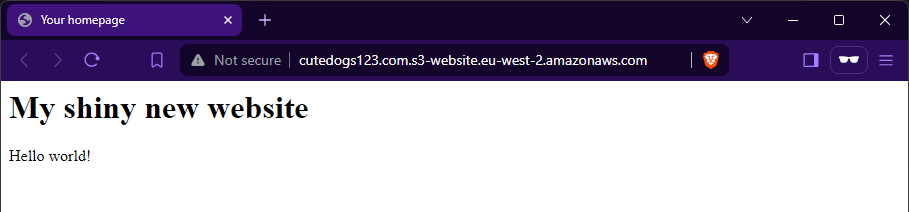
Success! Your no-expense-spared first webpage is up and running on S3. From here, you can add your resume details, your experiences, write a blog post, go wild.
Steps 7 -> N
If you followed these steps exactly, the cost of doing this should be precisely $0.00 thanks to the economies-of-scale principles of AWS enabling your initial S3 usage to effectively be free. However, if you add more features and things get popular, you may have to start paying a little, so it's worth getting up to speed with the AWS cost explorer and set yourself some budgets.
You can find all kinds of cost related insight on the Billing and Cost management section, within the AWS console
Considerations:
- - consider tailwindcss, tailwindui or material ui to style up your website
- - consider using cloudfront and a TLS certificate so that things run nicely under HTTPS
- - consider adding a domain name via route53, or another provider, and associate that with your new S3 bucket
Further reading on the above
Speeding up your website with Amazon Cloudfront Securing a static website with Cloudfront and Cloudformation Get started with tailwindcss to make your website shiny